

This tutorial will focus on the tools on the first tab that I didn't mention in the first part of the tutorial. When you click each of these tools, you will be brought to a pop-up window where you can make edits/changes to the image.


When the pop-up window appears, the image will automatically be black and white. Use the brush to restore color to the areas that you want to have color. In my example, I just colored my face and arms and left the rest of the image black and white. If you make mistakes, there's always an eraser tool. Also, you can control the brush size if you need to color smaller or larger areas of the image.
2) Recolor: This tool allows you to recolor parts of the image. This is a fun tool that can be used to change hair color or lip color. Here's an example:

To choose a color, either click on the preset colors or click on the box/button next to the color box I circled in the example above. Color I picked is sort of red/maroon and I used it to change my hair color in the image (my normal hair color is a medium to light ash brown).
3) Pixelate/Sensor: This function allows you to pixelate certain areas of the image. It sort of works like those tv sensors. ^^

For this example, I chose to pixelate my reflection on the mirror. One nifty thing about this tool is that you can control the size of the pixelation. Drag the circle to the right to have larger pixels, and keep it to the left for smaller pixels.
4) Blur: This allows you to blur certain parts of the image. When the pop-up window comes up, there are two tabs which allow you to blur images in different ways.
option 1

The first tab is easier to explain~ The whole image is blurred once you are on the tab, and all you have to do is use the brush tool to remove the blur from parts of the image. For this example, I left the background blurred, and removed the blur on myself. Also, under the brush size bar, there is a bar where you can increase/decrease the blur. Dragging the circle right will increase the blur and dragging it left will decrease the blur.
option 2

I'm not sure what this technique is called, but I'll try my best to explain it. >.< The first bar controls how much of the image is blurred (inside the inner circle is what is NOT blurred). If you move the bar to the right, the inner circle increases in size (less of the picture is blurred). For the outer ring, adjusting the bar to the right increases the distance between the inner circle and the outer circle (in short, makes it thicker). In between the inner and outer circle, the blur is like a gradient as seen in the pic above (the blur increases as it reaches the outer circle). You can move the circles around to change the area of blur by clicking and dragging with your mouse. There's also an option to hide the circles/guidelines and I marked it on the picture above (no circles).

option 1

option 2

This option is the polygonal lasso tool. All you have to do is create a contour around what you want to select and make anchor points by clicking. Each circle in the above image shows an anchor point. The circles won't appear until you close the contour. You'll only see lines and an orange circle, which marks where you have to click to close the contour. This is my favorite option out of the 3 since it's pretty easy to use.
option 3

This option is basically the marquee tool. There are 3 options: ellipse, square, and square with circular edges. In the example above, I used the square with circular edges option. You can resize your selection by hovering over the small circles until you see the diagonal resize cursor, and clicking and dragging. You can also move the selection around by clicking and dragging it with your mouse.
Once you're done with the selection and click the button with the green check, another window will pop up.

You will be able to edit your selection and add a background to it. In this example, I chose a VIVI magazine cover styled background from the right side. There are more background types if you click what I labeled "more options." In the example above, I chose to add stroke. You can change the color of the stroke by clicking on the colored box on top of the bar. To remove the stroke, just move the circle to the leftmost. You can also add shadow and feather to your selection. There's a check box that you can tick to add shadow on the small window. To feather your selection (blur the transition between your selection and surrounding), drag the circle on the feather bar to the left. The last thing you can do is control the opacity of the selection.
6) Pen tool: You can use this option to draw cat ears/faces or bunny ears~ ^-^ Or write words or whatever you want.
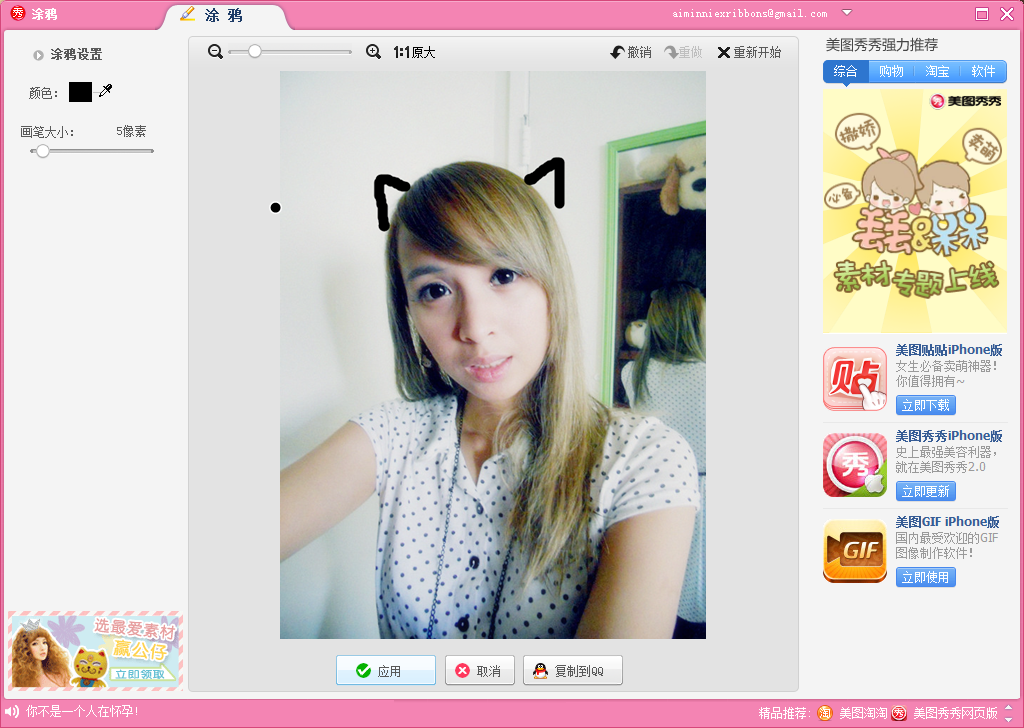
In this window you can change the color of the pen and size of the pen on the left side~ I just drew cat ears on the sample for fun.
7) Spot Healing Brush: Use this option to repair unwanted marks on the image. You can use this option to remove text on the image or remove blemishes. All you have to do is highlight the area with your mouse as shown in the image below.

This is a very useful tool, but I think it sucks that it allows you to remove watermarks. :(
So that's all of the tools. I'll be writing another tutorial soon on the beauty tools. I hope this tutorial was helpful~
Rennie (◕‿◕✿)
Hey! I like your tutorial,but i have a something to aks. You know,there are some blocked effects in Xiu Xiu,and i was wondering if you know how to make them work ^.^
ReplyDeleteI apologize for the extremely late response. >.< I've been a bit busy lately.
DeleteBlocked effects? Do you mean the effects that have a yellow band on the top left with two Chinese characters? Those effects are VIP effects~ You have you have to log in to use them. You're only allowed to use/download 100 of them per month. I can make a tutorial for that soon if you want. :)
If you can do a tutotial,it will be a really good help. Thank you~ ^.^
Deletehello! thankyouuuu~
ReplyDeletePS. how do u reduce size of photos (smaller than 4000kb)?
I've used to buy lots of things on Taobao and tried Bhiner before, however, its service fee is a little more expensive, now I have Bhiner alternatives TaobaoGuides, it only charges for the shipping fee.
ReplyDelete